
 

When is a Commodore 64 not a Commodore 64? When it's a ZX Specadore 64! So how the blazes did this all come about then? Well, I've had my trusty C64C for MANY years now - in fact, it was bought brand new way back in 1987 I think! Unfortunately over time the keyboard changed colour from a vibrant light grey/cream colour to a horrible yellow mess. So I decided to give it a fresh new coat of paint. As I rather like the colour scheme of the original Sinclair ZX Spectrum I thought I'd paint up my C64C in ZX Spectrum style colours! The first step was to dismantle my C64. After removing all the screws I unplugged the keyboard and power light LED. Take a look at the photo below and note the colour of the case inside - that is what colour it USED to be! Now compare that to the top casing which is now a 'Caramac' yellow colour. Ewww! Also, note how dusty the innards of my C64 were! 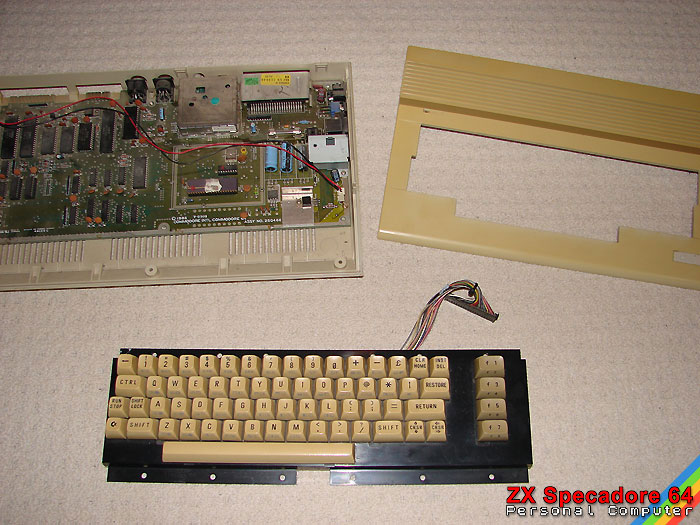
As my C64 was going to have a Speccy colour scheme I thought it would be fun to add the famous embossed 'Sinclair' logo to the keyboard case. To achieve this I printed a SINCLAIR logo on a glossy adhesive label and then stuck a few layers of label together to give it some thickness. Next came the fiddly part. Using a VERY sharp craft knife I carefully cut out each letter of the Sinclair logo. As the Sinclair logo is made out of square-shaped characters this wasn't too difficult. As I had printed the logo on glossy labels it meant they were adhesive. I then carefully stuck each letter onto the keyboard casing making sure they were straight. Things got really tricky when it came to adding the dots to each letter 'i' as they were tiny! 
Next up was the fun part - painting it! To start things off I gave the case a good coating of red primer inside and out - this will give the black paint a good surface to adhere to. Looks quite nice red, doesn't it? I then left it overnight to completely dry - although primer paint does dry very quickly so you can handle it even after only a few minutes. 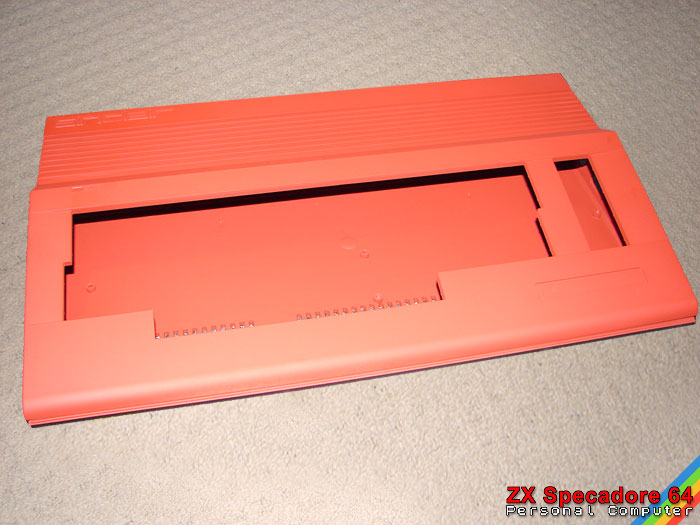
A good few coats of matt black spray paint went on next. Special care was made to the vents in the top as these would show up the red primer paint underneath if I didn't paint it properly. Once I was satisfied with the black coating it was left to dry once again. I then pinched the keyboard out of an old breadbin style C64 and reassembled the C64 (after giving the board inside a careful clean too!) 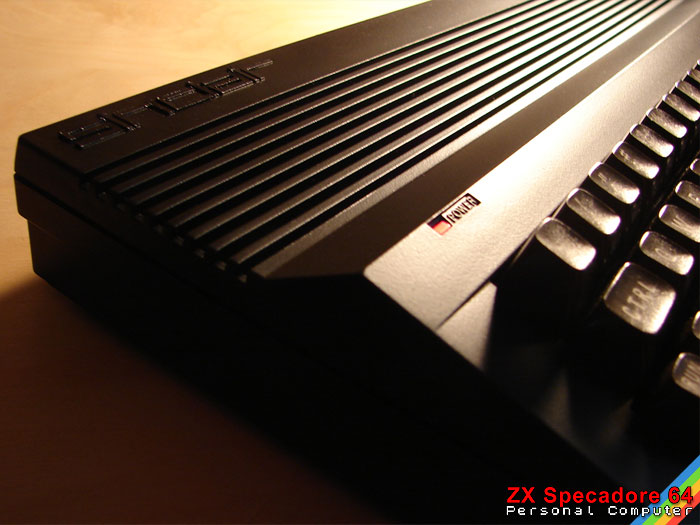
For the finishing touch I printed a new case logo. This had the name 'ZX Specadore 64' in red lettering (inspired by the Sinclair ZX Spectrum+) and 'Personal Computer' produced using the 'ZX-Spectrum' font. I then scanned the side of my rubber-key Spectrum to get the correct colours for the stripes and printed the stripes on adhesive glossy paper. These were then simply stuck onto the case and wrapped around before the case was reassembled. 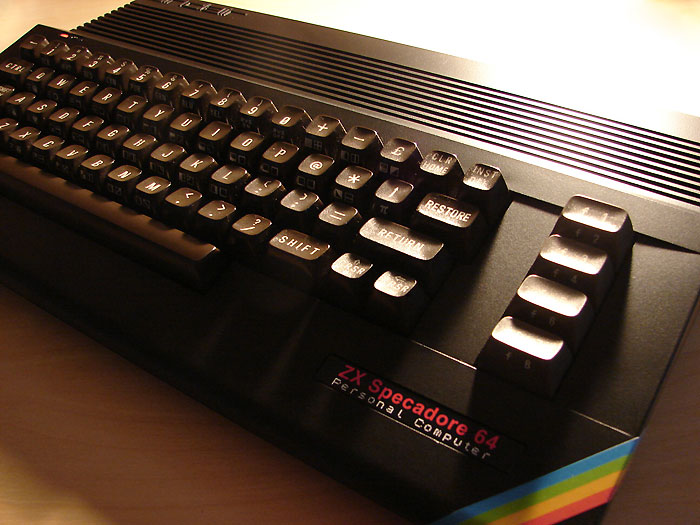
As both the joystick ports, the on/off switch and the power port in the side are all black in colour they all look rather nice with the black case. The picture below also shows how the colour stripes were wrapped around the side of the case. 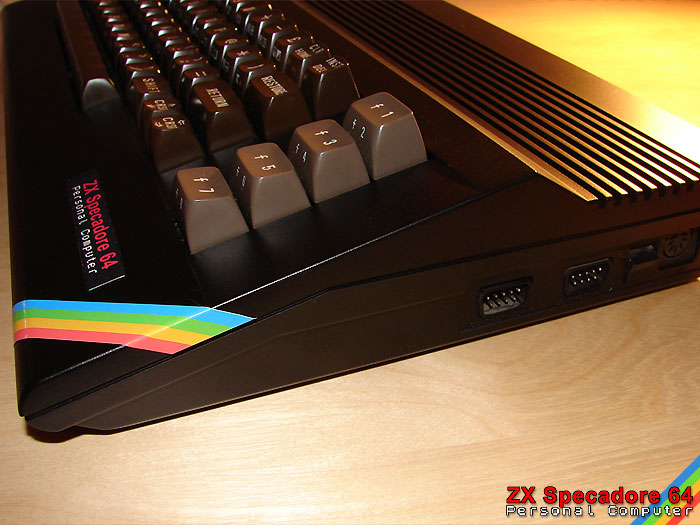
And finally, just to prove the C64 survived the ordeal of becoming a ZX Specadore 64 here's a picture of it in its full working glory. My lil' rubber-key Speccy can also be seen in the pic next to its new 'big brother'. Thanks to a suggestion from Merman the Specadore 64 can be seen running his nifty Sinclair 64 slideshow which features lots of excellent Speccy loading screens ported to the C64. You can download a .D64 version of the Sinclair 64 demo by clicking the link below. Sinclair 64 Slideshow / Merman (1.5mb .ZIP file) 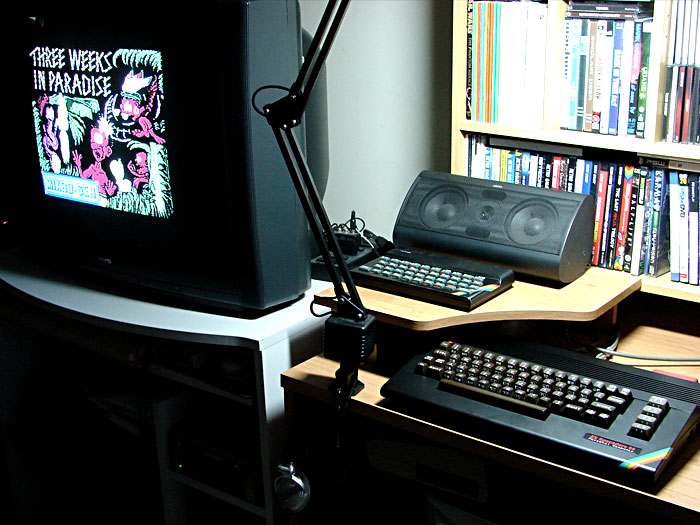
And that's it! I hope you enjoyed reading about the making of the ZX Specadore 64. Tune in next week when I'll be shoehorning the innards of an Amiga 500 into a Sinclair ZX80 keyboard ... (Just kidding!) :)
Return to the main section |